
Shopify Tutorial: How to generate API key
Here’s another question to solve: “How to generate API key for my store?” To answer this question, you have to know API key can only be generated from a particular store from a partner account, you can create a development store and within that development store you can create that API key. First, you have to go to your partner account, find the specific store you need to generate the API key, then log in to your store, go to the private app section sited in the left panel, open “Apps” option that will show you the private apps section and click on “Manage private apps”. To create a new API key, you need to click on “Create a new private app” and there you can customize your settings. As part of the requirement of this app, you need to give access to some particular sections of Shopify; there is a list of the options that you need to enable like read access or write access, you can change it if it’s required, after finishing, you need to click on “Save”. Once it is saved you can see the API key, the password and the example URL.
Step 1: Go to your partner account
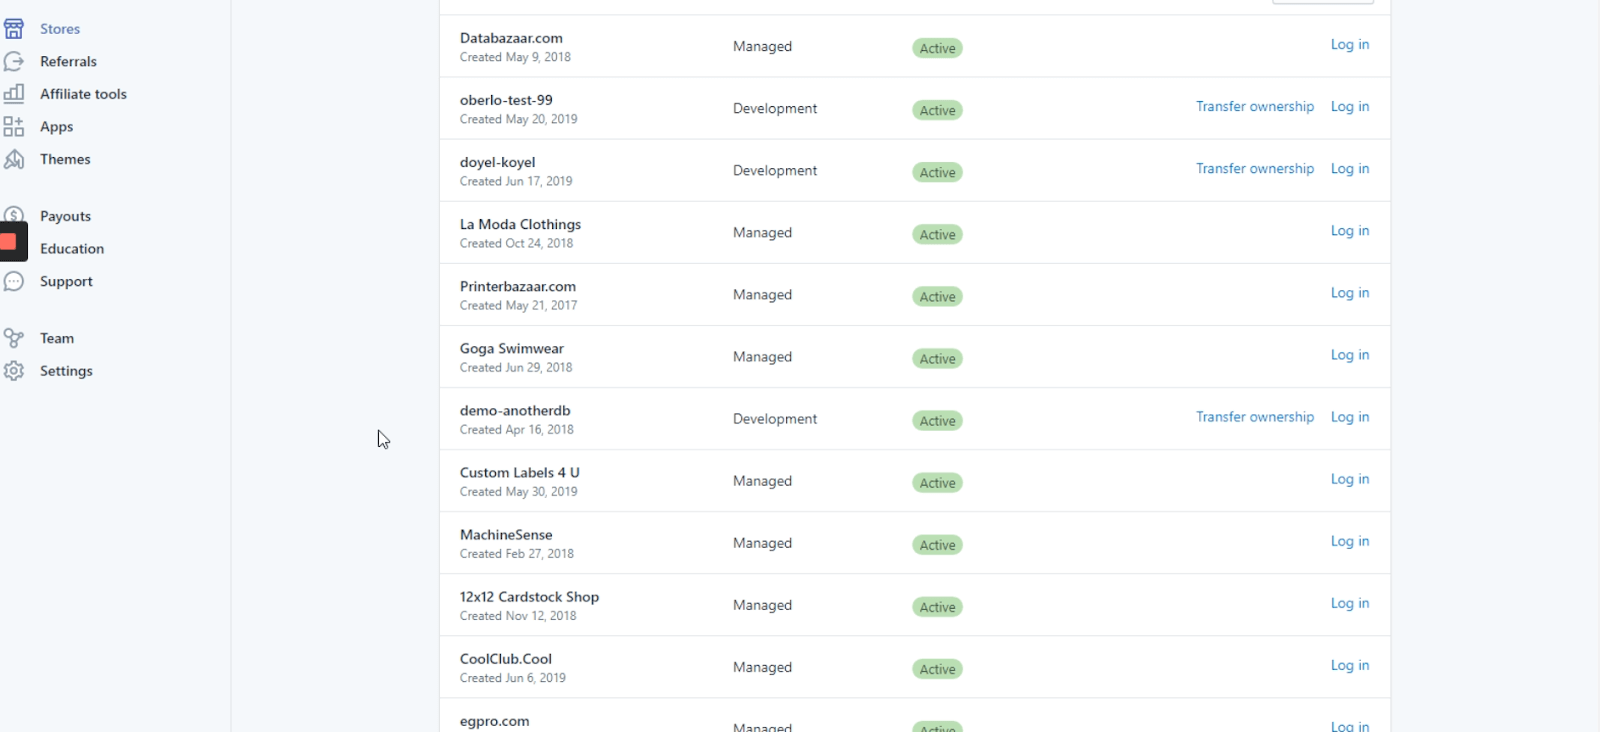
In your partner administration account, find the specific store you need to generate the API Key
Step 2: Now, log in your store
Here, I’m using this store just an example to show you the process.
Step 3: Go to the private app section sited on the left panel

Once we’ve logged in, we must click on the “Apps” option, this will show you the private apps section.
Step 4: Click on manage private apps

Here we have to go to the “Manage private apps” link, sited just above the “Learn more about apps” link.
Step 5: Click on “Create a new private app”
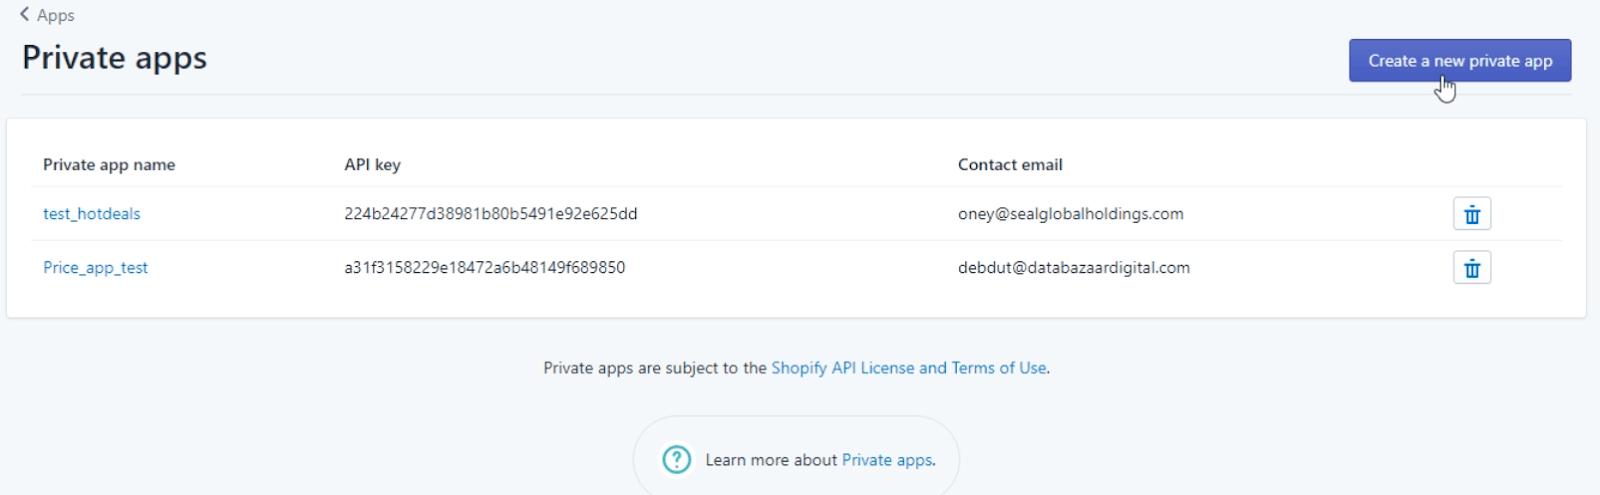
Click on “Create a new private app”, that is in the upper right corner in a blue box.
Step 6: Fill the form with your preferences
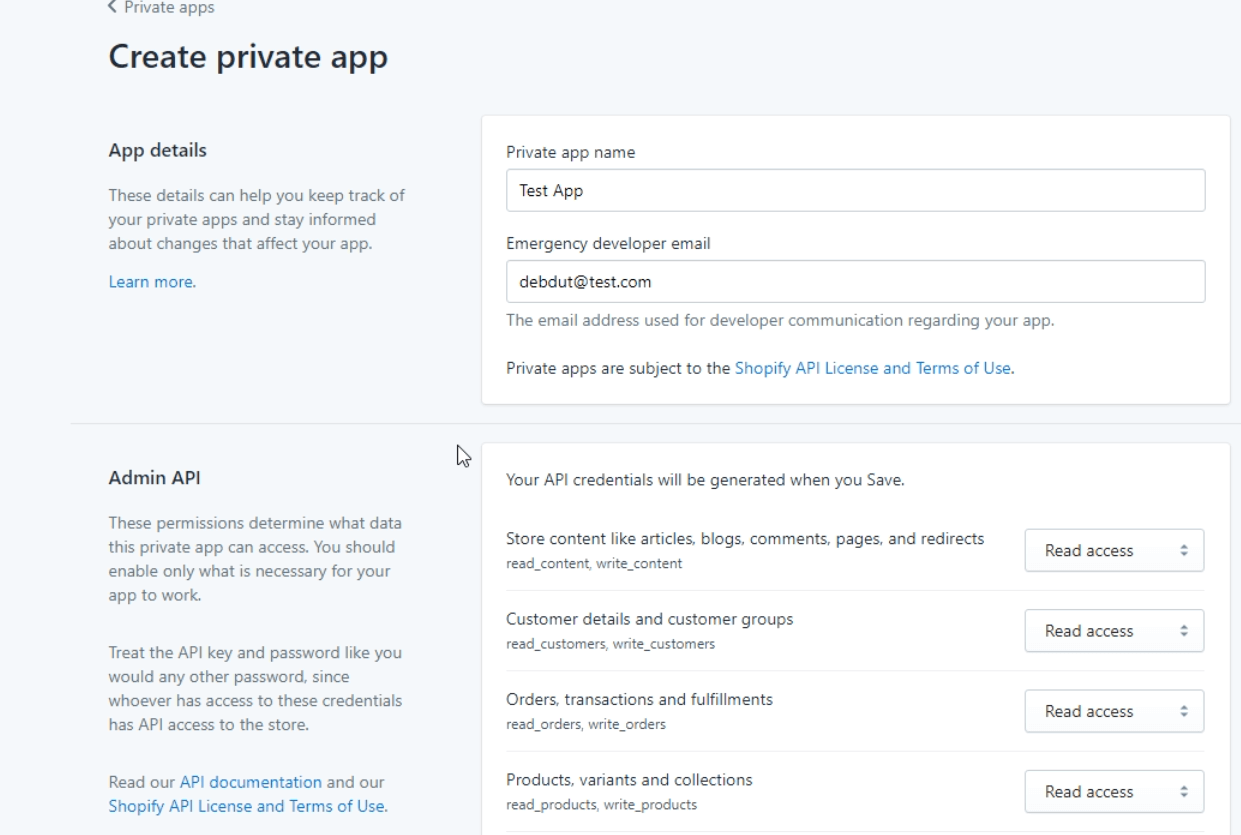
Here you’ll have to fill the form with your custom settings, such as a “private app name” or “Emergency developer email”.
Step 7: Click on “Save”
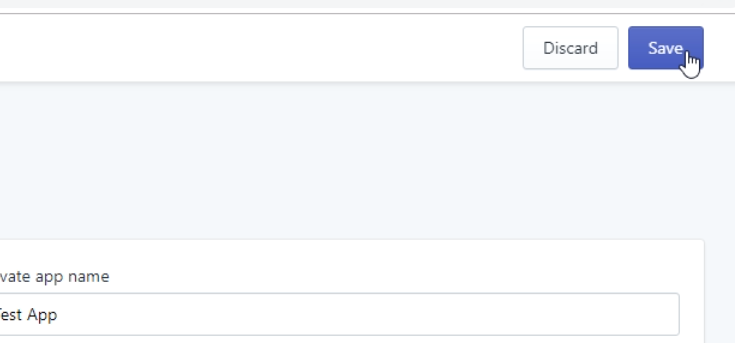
Once you’ve clicked on “Save”, the page will display a terms and conditions warning, we just have to click on “understand, create the app” to proceed.
Step 8: Scroll down to find your Admin Api Section
.png)
Now you’ll be able to see some new information, sited above the “ADMIN API PERMISSIONS” Here you’ll find the API Key, Password and URL.
Step 9: Edit permissions
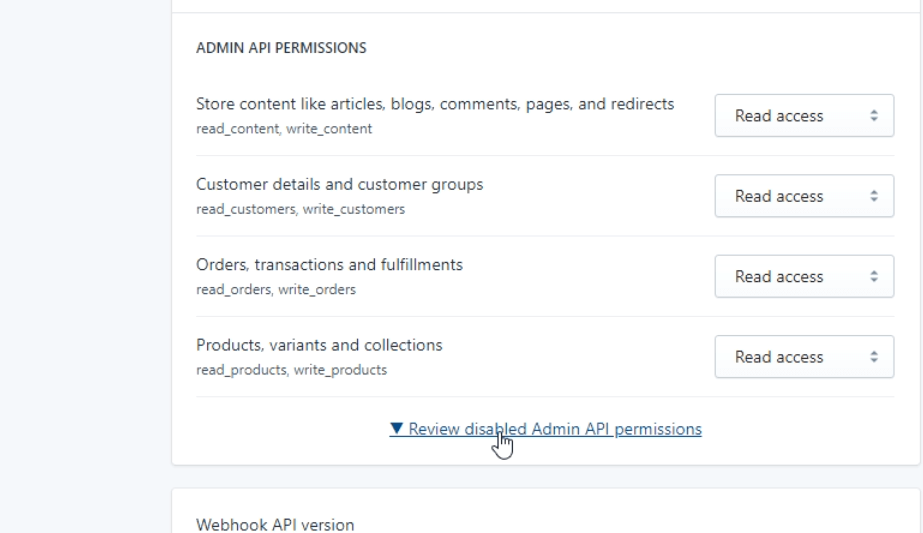
In case you would want to customize the reading and writing permissions, you can go to the ADMIN API PERMISSIONS and click on “Review disabled Admin API permissions” to see all the items that you can allow or restrict. “Read access”, “Read and write” and “No access”.

Stay updated with our
latest news & offers
Sign up to get our Newsletter.

.png)