
Here’s a doubt about Custom Product Attributes: “An implementation vendor has set up our shop but there are not enough fields to store our product data”. These two things can be achieved separately. In the first one the solution is a meta-field, with the use of a meta-field, you can store additional product attributes for a single product, before adding it let’s review how meta-field works; there are three things you can add in the meta-field: one is the namespace, another one is a key, the third one is a value. So this kind of things we can add in the product details using a Shopify app which its name is “Metafields master”. You can download it in the Shopify store, once you have installed it, click on the app and the app tools will appear. After this, go to the page you want to customize, open the product Metafields master, go to the products section, search for the product, open the product and you can see over here there is no meta-tag created so you have to create a new one, fill in the blanks according to the product features and click on “Save” and then copy the written information in the clipboard. Now you need to go to the Themes section once you are there, you have to click on actions to open the dropdown list, now just click on “Edit Code” and this will enable the code tool. Here we have an index, this points that our section is in “Product-template.liquid”, so now we know that template it’s already named as section, we have to go there using the same list on the left side to Templates, and then Product-template.liquid. Once you have found it, just open the code and paste your clipboard. I added this <br/> to adjust the text below the other keywords, instead of just adding it next to the other words. So this is the way we have entered a metafield using “Metafields master”; now we can see it in the frontend and this can be done for multiple products with the same name.
Now it’s time to go to the second point that is a drop-down on the product detail page. So, how can I do that? In a particular product page, there is a form that opens just before the “add to cart” and ends after it. So, I need to find that form and put some input value under this theme. This is a theme where I have worked so I’m editing this theme. I need to go step by step and find the product page where it is just about the description it should be. Now go to the product section, in the product section it is coming from the product template, here is the product template and the product template form is coming from the product form. Here I went to the product form, then I’ve added a few lines, these lines add a “Select box” with 7 options in a single dropdown list. Now over here you can see I have added a few lines, I have added one select box with some values under it. So, for these fields, if we write something into it and put that value into the cart it will be coming up with that value, so when you are in the backend like once the other has placed, you can see all that value you have given over here. So, in this way, the customer can write some data as part of the requirement in that particular product page. Once he has the changes saved, he just has to refresh the page to see the results.
Shopify Tutorial: Add custom product attributes
Step 1: Download the Custom Metafield Master app

You can find it in the Shopify app store.
Step 2: Click on the app
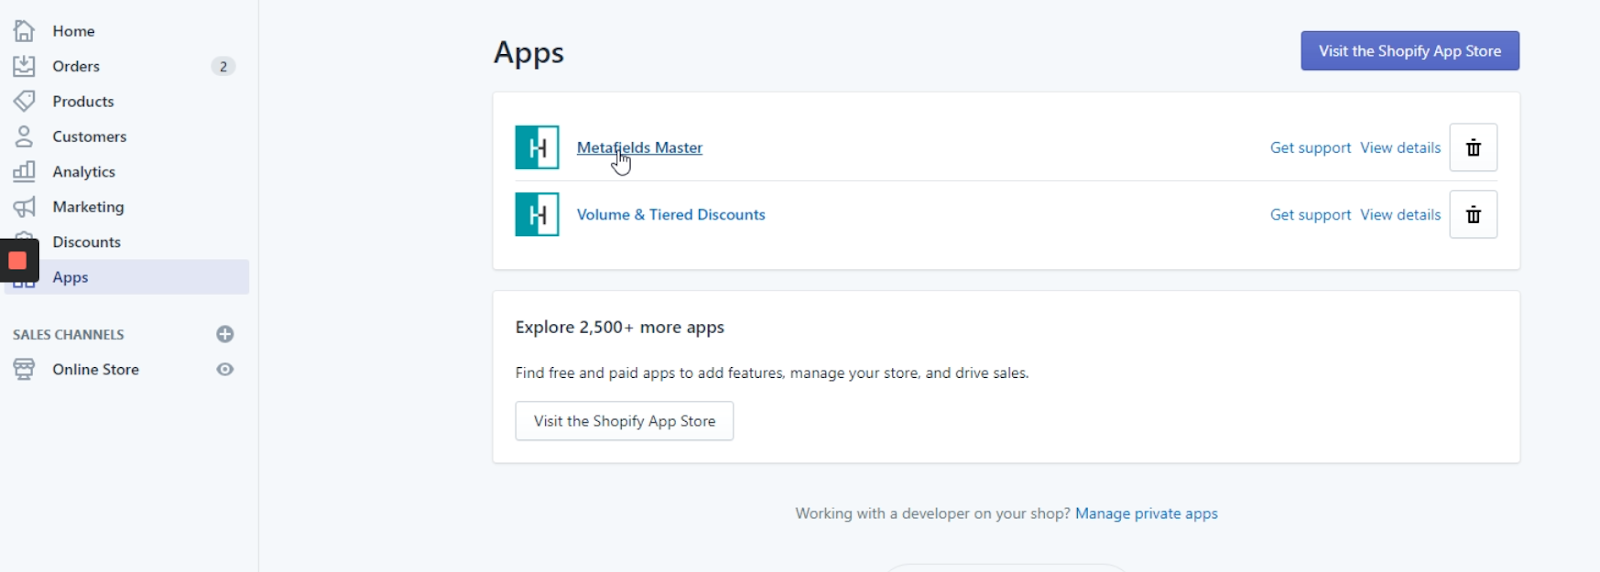
Once you have installed it, click on the app and the app tools will appear.
Step 3: Go to the product page you want to customize
.png)
Here we have an example of a product page, where I’m gonna add a tag just below the search keywords using the Custom Metafield Master app, copy the name of the product by highlighting it and pressing (control + C).
Step 4: Click on “Product” in the Metafield Master app tools
.png)
Back in the step 2, we’ve clicked on Metafield Master app, this is the site you should see after that.
Step 5: Browse the name of the product you’ve chosen
.png)
Now, paste the product of the name (control + V) in the search box of the Metafield Master app searching tool, then click on the resulting element.
Step 6: Click on “Create New”
.png)
As in this example, there’s no metadata created, we’ve to create a new one to proceed.
Step 7: Fill the form with the Tag information
.png)
Here, I filled the form with the tag information,with some detailed information, but this is actually up to you, once we’ve filled the form, click on the save box. then “50mm” Tag will be added.
Step 8: Now, click on the “Copy to clipboard” tool
.png)
When you create a new meta field, you will be able to manage them from this page, such as edit, copy, erase and view, you must click on the “Copy to clipboard” tool before proceeding.
Step 9: Now go to your Themes page/Actions/Edit Code
.png)
Once you are in your Themes page, you have to click on actions to open the dropdown list, now just click on “Edit Code”, this will open the code tool.
Step 10: Go to Product.Liquid
.png)
Here we have an index, from Templates, go to product page, now we know that template it’s already named as a section, so we have to go there using the same list on the left side, go to “Sections” and then click on “Product-template.liquid”.
Step 11: Find the product description code

Once you have found it, just open the code and paste your clipboard from step 8.
I added this <br/> to adjust the tag below the other keywords, instead of just adding it next to the other words.
Step 12: Go to back to the Product page and refresh
Now, the tag I wanted to add it’s already there.
Step 13: Add boxes and a dropdown list to the product page
.png)
In this example, I’m gonna add 4 boxes and a dropdown list.
Step 14: Go to product section, in the product section, go to the product template
.png)
Here I went to the product form, then I’ve added a few lines, these lines adds a “Select box” with 7 options in a single dropdown list.
Step 15: Add fields to the form
.png)
These 4 lines corresponds to 4 fields to fill by the final user, when all the changes have been done, click on save.
Step 16: Go back and refresh the product page
.png)
Once we’ve the changes saved, you just have to refresh the page to see the results.

Stay updated with our
latest news & offers
Sign up to get our Newsletter.

.png)